Configuring the default colors palette
This reference explains how to configure the default colors palette used to customize visualizations and dashboards.
Introduction
The Color palette page controls the default colors available in the color-picker. Find the color picker in the Data Explorer page when customizing visualizations (known as s) and in the Dashboards page when customizing dashboards.
In the Color palette page, update or remove default colors, and add new default colors.
For example, see the default colors that appear in the Color palette page below.

The default color palette of Adverity.
These twelve default colors appear in the top row of the color picker, as shown in the example below. The color picker is found in various pages of the Data Explorer and Dashboards pages.
An example of the default colors within the color picker.
Configuring the Color palette page
To access the Color palette page, follow these steps:
-
Select the workspace you work with in Adverity and then, in the , click Administration.
-
In the , click Color palette.
In the Color palette page, configure the default colors using the following options:
Adding a new default color
To add a new default color, follow these steps:
-
Within the row of default colors, click
 Add.
Add. -
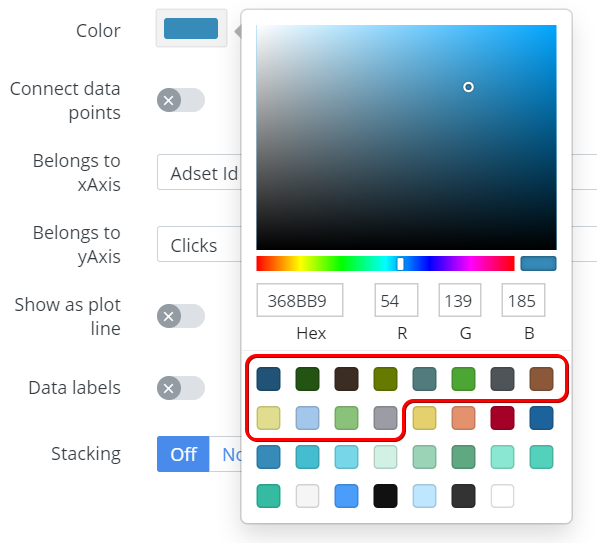
Click on the color part of the new color block. See the figure below.

Click the color part of the new color block to open the color picker.
-
In the color picker pop-up, choose a new color through one of the following options:
-
Enter the HEX color code of the new color.
-
Enter the red (R), green (G), and blue (B) values of the new color.
-
Enter the HSL values of the new color.
-
Select the new color in the color map.
-
Select one of the previewed colors.
-
-
Click Update.
As a result, a new color is added to the default color palette.
Updating a default color
To update a default color, follow these steps:
-
Within the row of default colors, click on the color part of the color block to update.
-
In the color picker pop-up, choose a new color through one of the following options:
-
Enter the HEX color code of the new color.
-
Enter the red (R), green (G), and blue (B) values of the new color.
-
Enter the HSL values of the new color.
-
Select the new color in the color map.
-
Select one of the previewed colors.
-
-
Click Update.
As a result, the chosen default color is updated.
Removing a default color
To remove a default color, follow these steps:
-
Within the row of default colors, click
 within the color block of the default color to remove.
 -
Click Update.
If you do not click Update, the default color is not removed from the color palette. Make sure you click Update before leaving the Color palette page to remove a default color.
Resetting last saved color palette
Click Reset to restore a color palette to the last saved state. Resetting the color palette to the previous state allows you to change the color palette and undo them within a single click.
To restore the last saved color palette, within the row of default colors, click Reset.
As a result, Adverity restores the color palette to the last saved palette state. If no changes have been made to the color palette, Adverity disables the reset button.